Python嵌入式包(embeddable package)是Python的一个特殊版本,通常被称为绿色版或嵌入式版。这个版本的Python是一个ZIP压缩包,解压后包含一个最小的Python运行环境,不包括文档、IDLE、pip等工具。这个版本的主要用途包括嵌入到其他程序中、与系统的Python环境隔离以及方便地分发脚本。
一、下载安装 python embedable 下载地址:https://www.python.org/downloads/windows/
下载之后解压解释器,我们将python解释器和代码文件夹放在同一个层级
D:\py_test
code
python-3.13.2-embed-amd64
二、库加载索引修改 在python-3.13.2-embed-amd64文件夹中找到python313._pth
1
2
3
4
5
6
python313.zip . # Uncomment to run site.main() automatically # 原有备注的,将备注符号取消 import site
三、pip的安装 pip是python中标准的库管理器,允许安装和管理不属于python标准库的其他软件包。
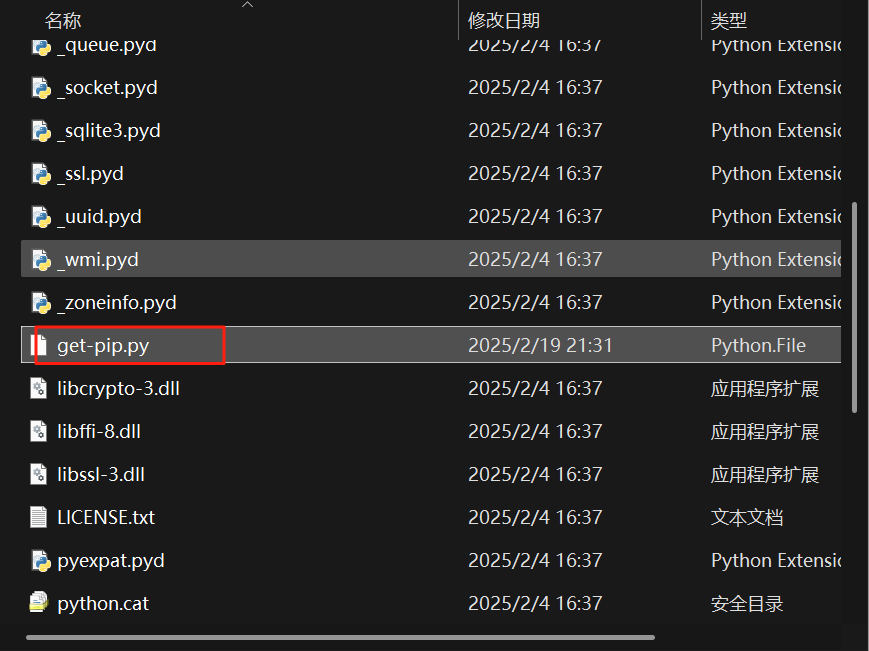
打开这个链接https://bootstrap.pypa.io/get-pip.py
在python-3.13.2-embed-amd64文件夹中使用powershell执行.\python.exe get-pip.py
1
2
3
4
5
6
7
8
.\python.exe get-pip.py Collecting pip Using cached pip-25.0.1-py3-none-any.whl.metadata (3.7 kB) Using cached pip-25.0.1-py3-none-any.whl (1.8 MB) Installing collected packages: pip WARNING: The scripts pip.exe, pip3.13.exe and pip3.exe are installed in 'E:\test_learning\py_embeddable_test\py313\Scripts' which is not on PATH. Consider adding this directory to PATH or, if you prefer to suppress this warning, use --no-warn-script-location. Successfully installed pip-25.0.1
安装完成后文件夹会多出两个新文件夹Lib和Scripts
四、如何安装新的模块 到这里我们的安装和配置结束了,接下来开始使用pip。
1
2
3
4
5
6
7
8
9
python-3.13.2-embed-amd64\Scripts> ls 目录: E:\test_learning\py_embeddable_test\python-3.13.2-embed-amd64\Scripts Mode LastWriteTime Length Name ---- ------------- ------ ---- -a---- 2025/2/19 21:41 108409 pip.exe -a---- 2025/2/19 21:41 108409 pip3.13.exe -a---- 2025/2/19 21:41 108409 pip3.exe
在使用pip之前,我们先配置阿里源,在python-3.13.2-embed-amd64文件夹内新建pip.ini文件
1
2
3
4
5
[global] timeout = 6000 index-url=http://mirrors.aliyun.com/pypi/simple/ [install] trusted-host=mirrors.aliyun.com
测试安装requests三方库,在python-3.13.2-embed-amd64文件夹下执行
1
2
3
4
5
6
7
8
9
10
11
12
13
14
15
16
.\python.exe -m pip install requests -t .\Lib\site-packages Looking in indexes: http://mirrors.aliyun.com/pypi/simple/ Collecting requests Downloading http://mirrors.aliyun.com/pypi/packages/f9/9b/335f9764261e915ed497fcdeb11df5dfd6f7bf257d4a6a2a686d80da4d54/requests-2.32.3-py3-none-any.whl (64 kB) Collecting charset-normalizer<4,>=2 (from requests) Downloading http://mirrors.aliyun.com/pypi/packages/27/f2/4f9a69cc7712b9b5ad8fdb87039fd89abba997ad5cbe690d1835d40405b0/charset_normalizer-3.4.1-cp313-cp313-win_amd64.whl (102 kB) Collecting idna<4,>=2.5 (from requests) Downloading http://mirrors.aliyun.com/pypi/packages/76/c6/c88e154df9c4e1a2a66ccf0005a88dfb2650c1dffb6f5ce603dfbd452ce3/idna-3.10-py3-none-any.whl (70 kB) Collecting urllib3<3,>=1.21.1 (from requests) Downloading http://mirrors.aliyun.com/pypi/packages/c8/19/4ec628951a74043532ca2cf5d97b7b14863931476d117c471e8e2b1eb39f/urllib3-2.3.0-py3-none-any.whl (128 kB) Collecting certifi>=2017.4.17 (from requests) Downloading http://mirrors.aliyun.com/pypi/packages/38/fc/bce832fd4fd99766c04d1ee0eead6b0ec6486fb100ae5e74c1d91292b982/certifi-2025.1.31-py3-none-any.whl (166 kB) Installing collected packages: urllib3, idna, charset-normalizer, certifi, requests WARNING: The script normalizer.exe is installed in 'E:\test_learning\py_embeddable_test\python-3.13.2-embed-amd64\Scripts' which is not on PATH. Consider adding this directory to PATH or, if you prefer to suppress this warning, use --no-warn-script-location. Successfully installed certifi-2025.1.31 charset-normalizer-3.4.1 idna-3.10 requests-2.32.3 urllib3-2.3.0
参数解释 :
-m pip 以模块的方式运行 pip
-t .\python-3.13.2-embed-amd64\Lib\site-packages 指定三方库安装的位置
查看logs发现我们配置的阿里源是生效的。
五、vscode配置与运行 项目根目录新建.vscode文件夹,内部新建settings.json和launch.json
rootDir
.vscode
settings.json
launch.json
code
python-3.13.2-embed-amd64
settings.json
1
2
3
4
5
6
7
8
9
10
11
12
13
14
15
16
17
18
{ // python 使用import的时候能正确识别我们项目本地的三方库 "python.analysis.extraPaths": ["./python-3.13.2-embed-amd64/Lib/site-packages"], // 在py文件中打代码的时候能识别和补全代码 "python.autoComplete.extraPaths": ["./python-3.13.2-embed-amd64/Lib/site-packages"], // 具有环境变量的对象,这些变量将添加到将由 Windows 上的终端使用的 VS Code 进程。设置为 "null" 以删除环境变量 "terminal.integrated.env.windows": { "pythonPath": "${workspaceFolder}/python-3.13.2-embed-amd64/python.exe" }, "terminal.integrated.env.linux": { "pythonPath": "${workspaceFolder}/python-3.13.2-embed-amd64/python.exe" }, "terminal.integrated.env.osx": { "pythonPath": "${workspaceFolder}/python-3.13.2-embed-amd64/python.exe" }, // 第一次加载扩展时要使用的默认 Python 路径,在为工作区选择解释器后不再使用 "python.defaultInterpreterPath": "${workspaceFolder}/python-3.13.2-embed-amd64/python.exe", }
launch.json
1
2
3
4
5
6
7
8
9
10
11
12
{ "version": "0.0.1", "configurations": [ { "name": "Python:main", "type": "debugpy", "request": "launch", "program": ""${workspaceFolder}/code/main.py"", "console": "integratedTerminal" } ] }
保存好之后重启vscode。
重新打开vscode,在code文件夹新建main.py
1
2
3
4
5
import requests url = 'https://www.baidu.com' response = requests.get(url) print(response.text)
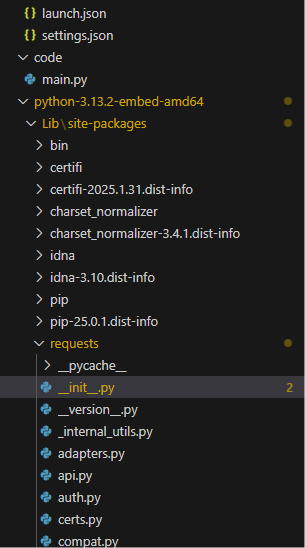
这是我们按着ctrl,鼠标放到requests上点击,如图所示,我们链接的是本地requests库,而非全局的。
一切准备就绪了,那么就可以按F5或者ctrl + F5进行调试或者运行了。
先来ctrl + F5,控制台打印出html格式的字符串
让我们打上断点,看看调试功能,按下F5,然后逐步调试
参考文章:https://www.bilibili.com/opus/917254269692805128 python嵌入式打包https://blog.csdn.net/m0_52475295/article/details/127411707 python嵌入式打包https://blog.csdn.net/Dome_/article/details/89763579 pip入门https://blog.csdn.net/qq_38463737/article/details/107780440 pip.inihttps://blog.csdn.net/python03012/article/details/137588709 requestshttps://blog.csdn.net/karmueo46/article/details/138992938 pylance无法识别导入问题https://marketplace.visualstudio.com/items?itemName=ms-python.vscode-pylance pylance官方文档